Custom Auth Configs
If you're building an agent, we recommend using sessions instead. See Using custom auth configs for how to use custom credentials with sessions.
Auth configs control how users authenticate with a toolkit. By default, Composio provides managed credentials for many toolkits. You create a custom auth config when the defaults don't fit your needs.
When to create a custom auth config
| Reason | Example |
|---|---|
| Toolkit has no managed auth | PostHog, Tavily, Perplexity: you must provide your own credentials |
| White-labeling | Show your app name on OAuth consent screens instead of "Composio". See White-labeling |
| Rate limits and quota | Composio's default OAuth app shares quota across all users. Your own app gets a dedicated quota |
| Custom scopes | You need permissions beyond what Composio's default app has approved |
| Custom instance or subdomain | Connecting to a self-hosted or regional variant (e.g., custom Salesforce subdomain) |
Creating a custom auth config
To create a custom auth config, click Create Auth Config in your dashboard, then navigate to Authentication management → Manage authentication with custom credentials.
You'll need to customize the auth config when you want to use different values than the defaults - such as your own subdomain, base URL, client ID, client secret, etc.
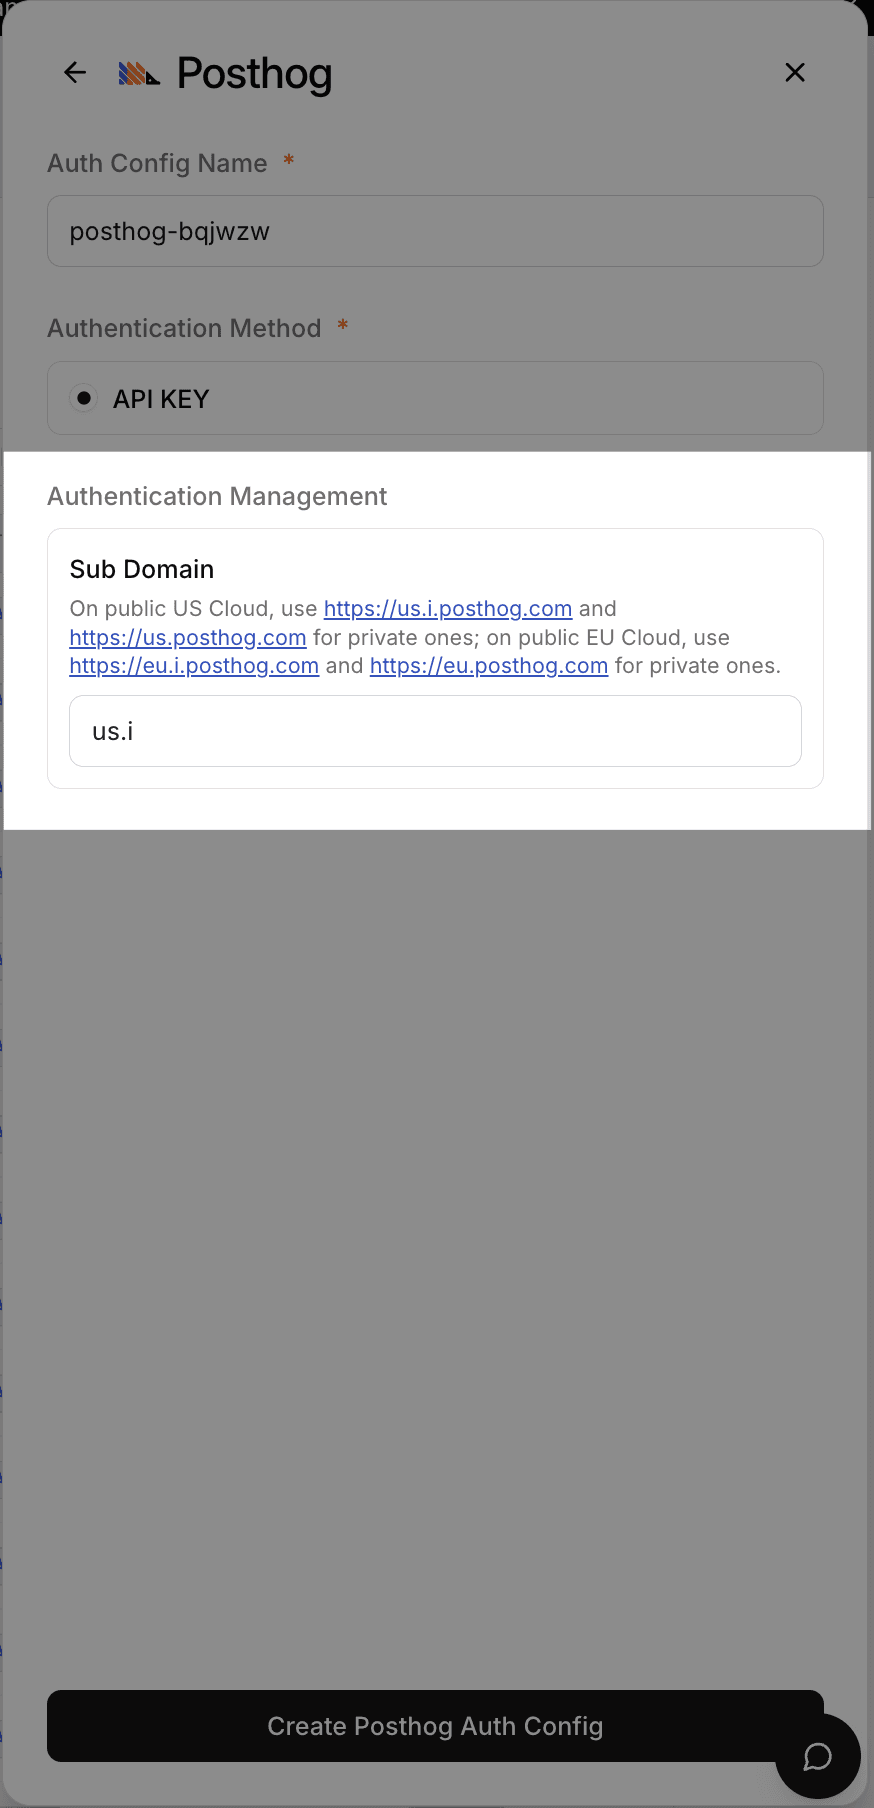
You may change the subdomain for the PostHog toolkit to match your own instance.
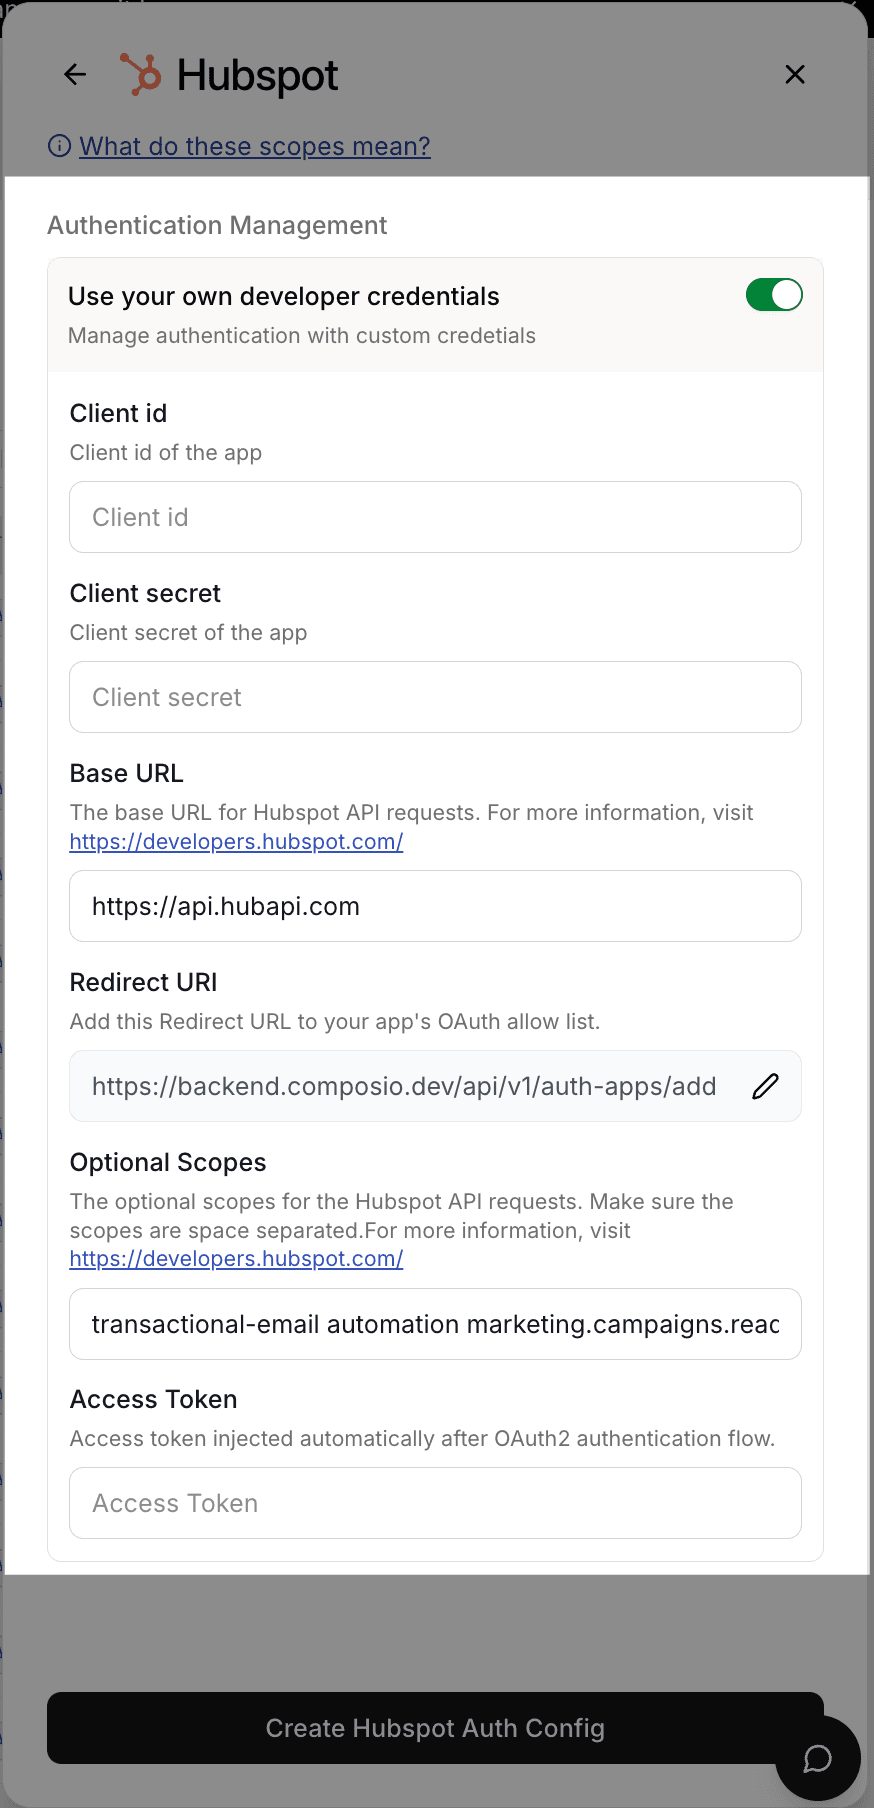
For Hubspot you may customize everything here. For each auth scheme there is a different set of fields.
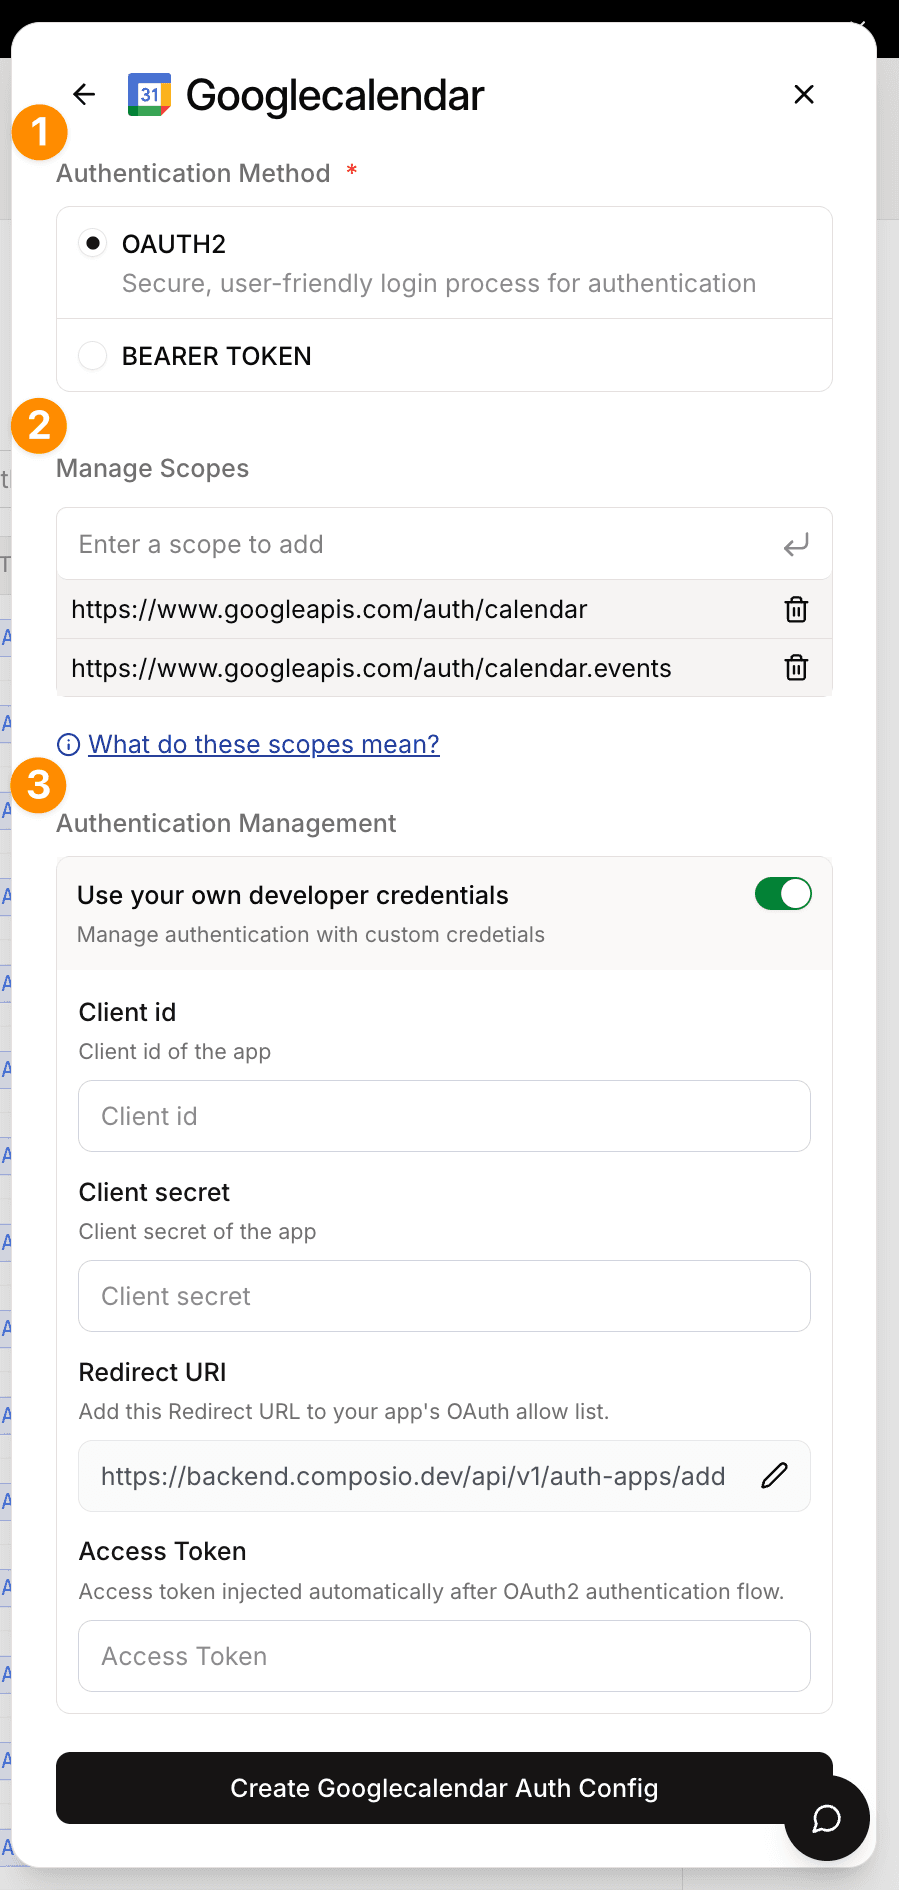
If you choose to use your own developer app for the OAuth2 scheme, you will have to provide the client ID and client secret.
Toolkits that support OAuth2 allow using your own developer app. This is the recommended approach for most cases.
Use your own developer app!
We recommend using your own developer app for the OAuth2 scheme as it is more suited for production usage with many users and more granular control over scopes.
However, getting OAuth approvals takes time, so Composio provides a default developer app!
OAuth2 Auth Configs
To set up a custom OAuth config, you'll need the OAuth Client ID and Client Secret.
You can generate the client ID and client secret from the toolkit's OAuth configuration page.
Examples for Google and GitHub:
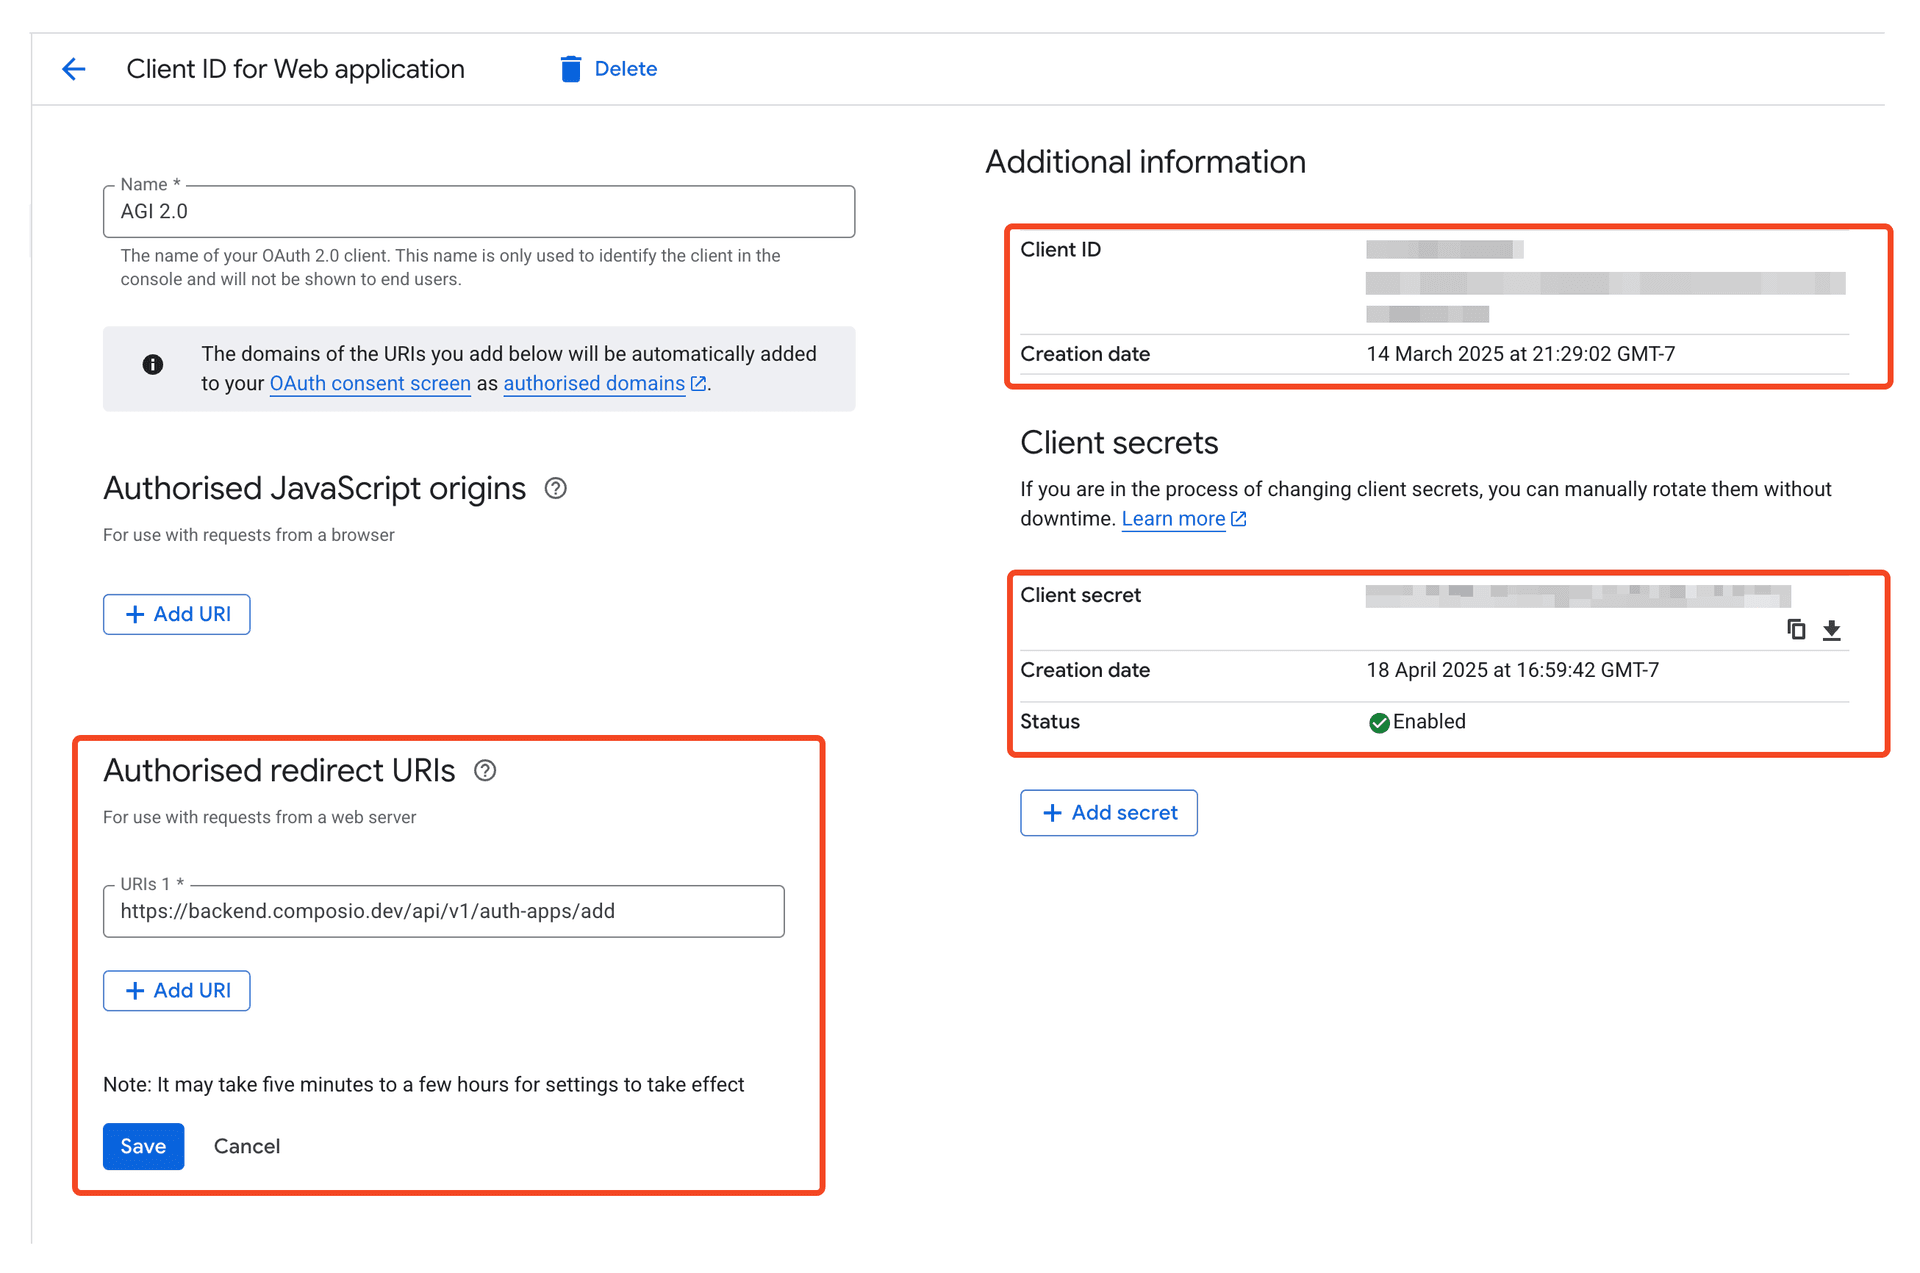
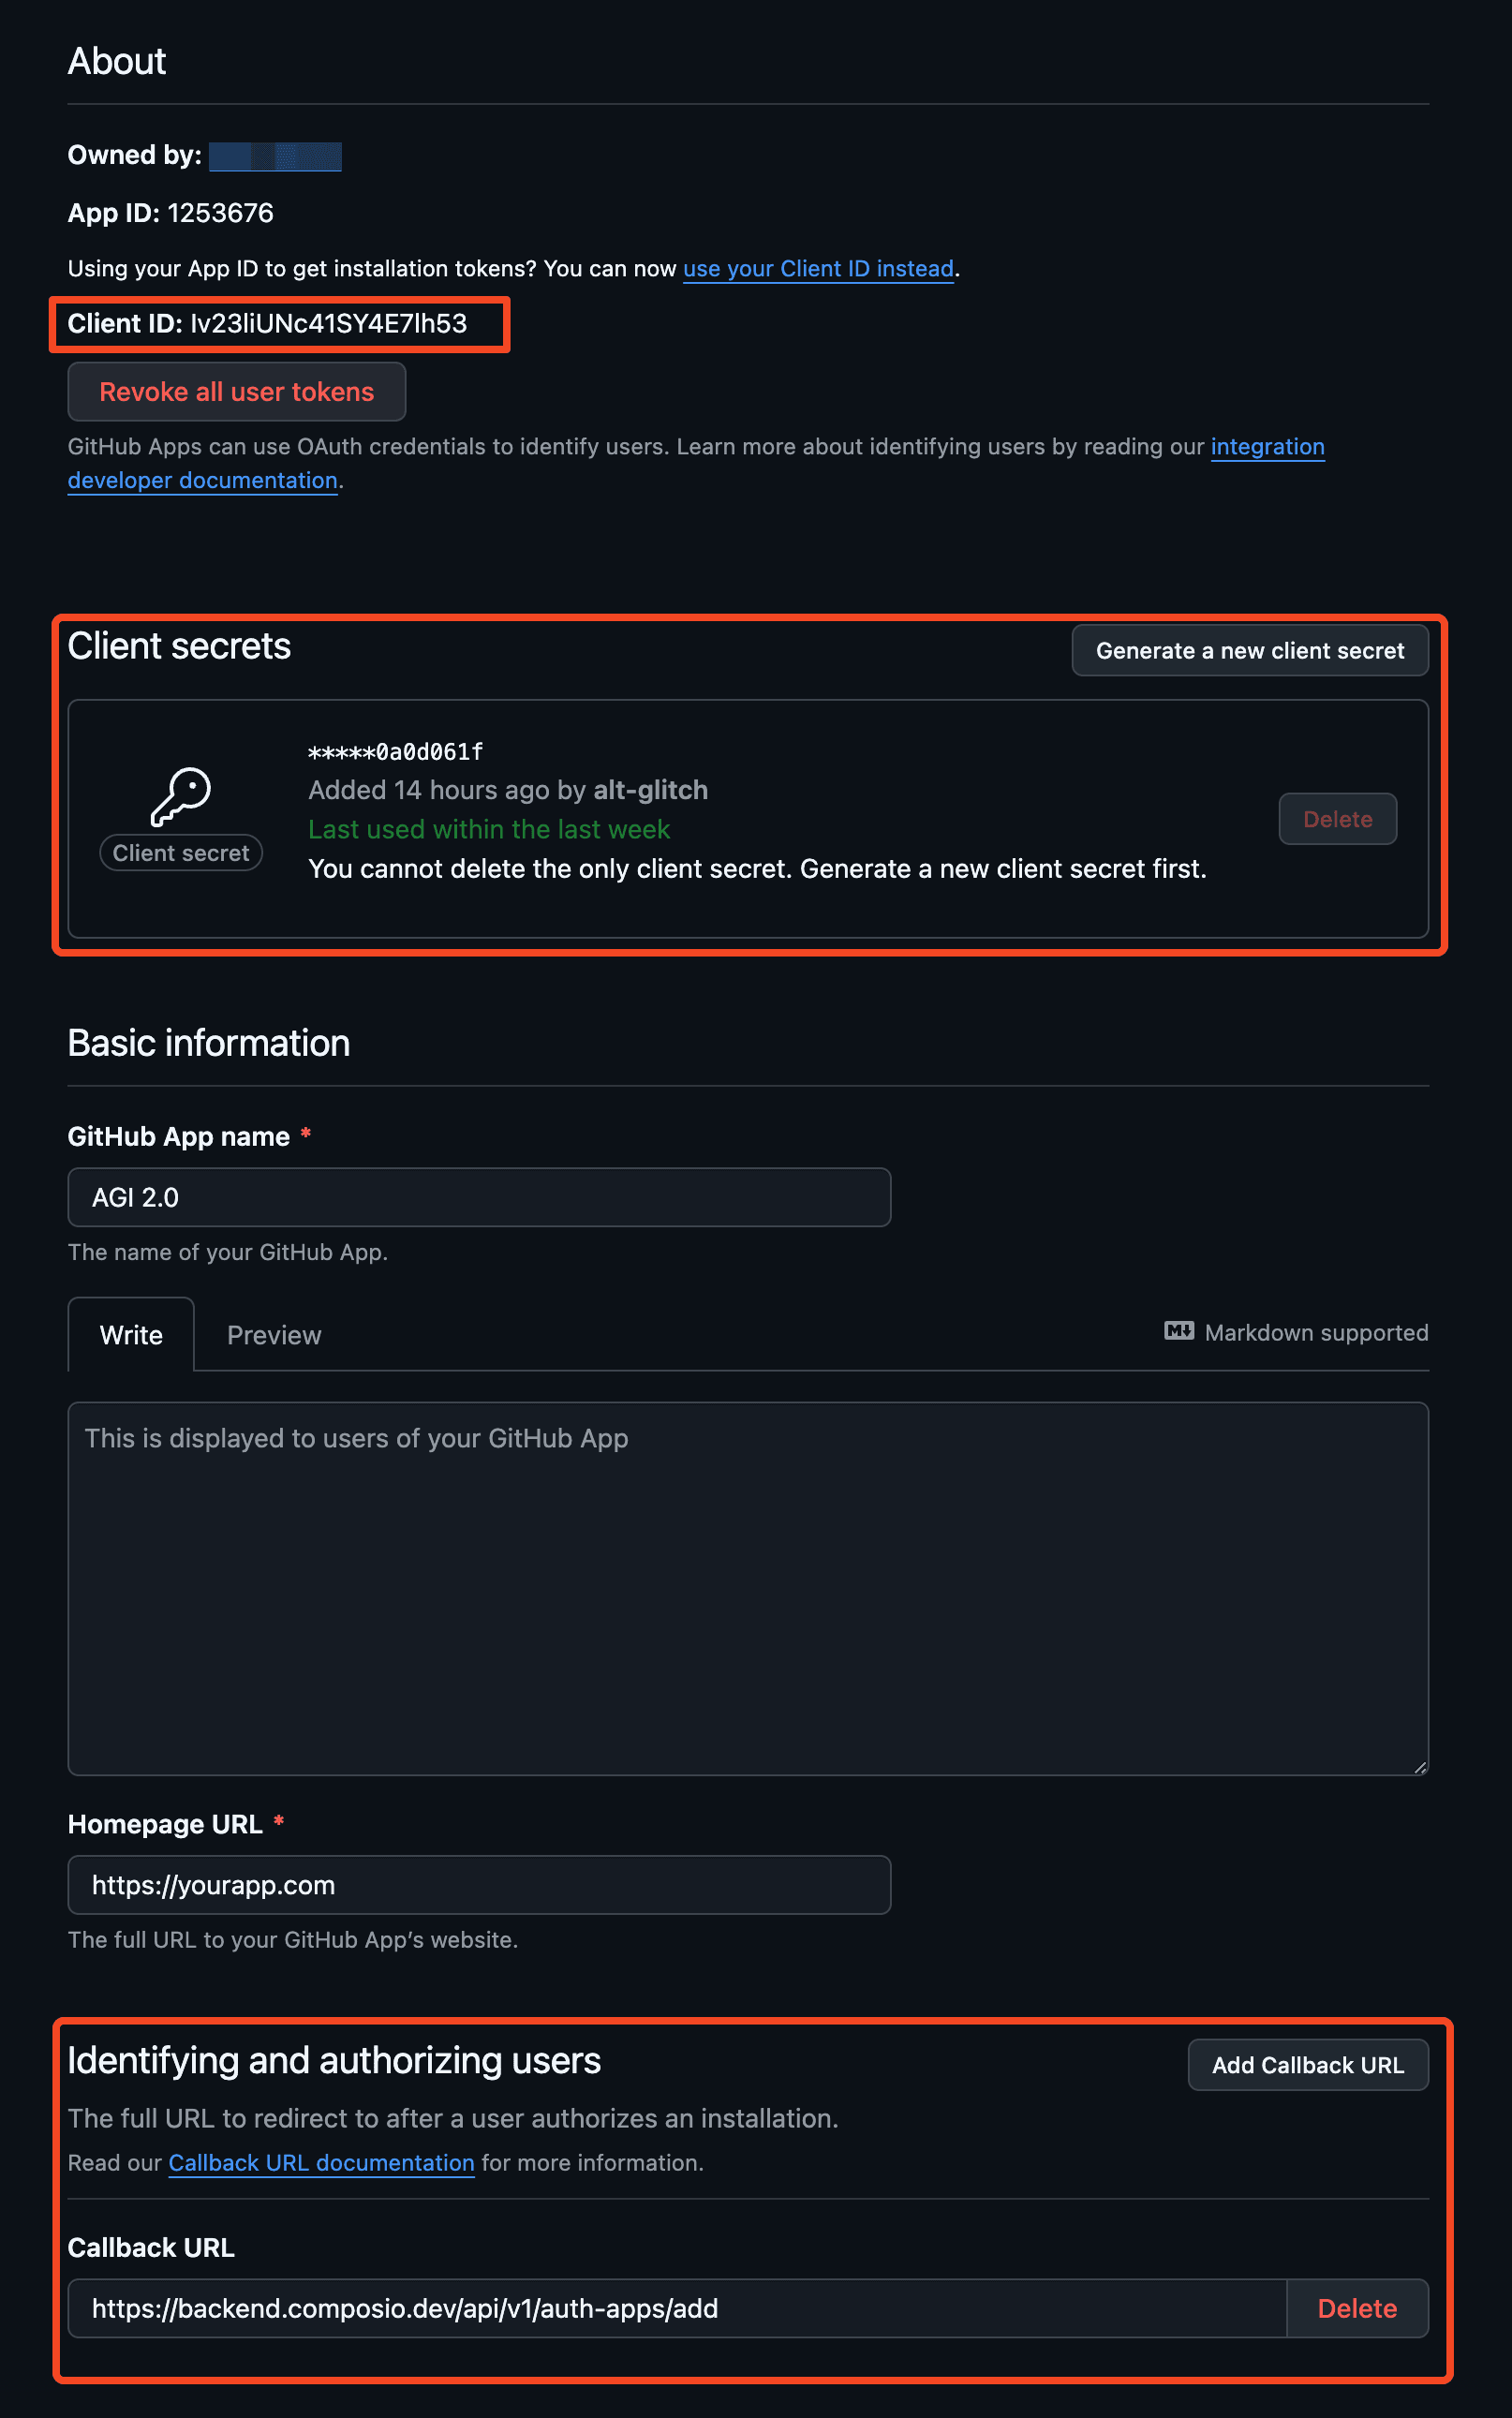
When creating your OAuth app, make sure to configure the Authorized Redirect URI to point to the Composio callback URL below:
https://backend.composio.dev/api/v3/toolkits/auth/callbackOnce you have the OAuth credentials, you can add them to the auth config in the dashboard.
- Select the OAuth2 scheme.
- Toggle on Use your own developer credentials.
- Enter the OAuth client ID and client secret for your developer app.
- Click Create!
This auth config is now ready to be used in your application!
# Create a new connected account
connection_request = composio.connected_accounts.initiate(
    user_id="user_id",
    auth_config_id="ac_1234",
)
print(connection_request)

# Wait for the connection to be established
connected_account = connection_request.wait_for_connection()
print(connected_account)
const connReq = await composio.connectedAccounts.initiate(userId, "ac_1234");
console.log(connReq.redirectUrl);
const connection = await composio.connectedAccounts.waitForConnection(
connReq.id
);
console.log(connection);